Bigscreen Beyond#
The Bigscreen Beyond is well-supported on Linux, but you may need to patch the kernel depending on your distribution, GPU vendor, and whether you need the BSB2e’s eye-tracking cameras.
The Bigscreen Beyond 2e’s eyetracking cameras, a.k.a. Bigscreen Bigeye, currently cannot be viewed on Linux out of the box due to a firmware issue, up to and including eyetracking firmware v54. See #Bigscreen Beyond 2e Eyetracking for recommended workarounds.
Kernel Patches#
Out of the box, your kernel (and/or Nvidia kernel modules, if applicable) will likely not be able to use the BSB’s display or eyetracking cameras correctly without some of the below patches:
-
For Nvidia:
- Requires driver 580+ open kernel modules
nvidia-bsb-dsc-fix.patch(source) - This corrects DSC timings, same as below, but for Nvidia.
-
For AMD:
bigscreen-beyond-kernel.mbx(as.patchrebased onto 7.0.12) (source) - Allows the headset display to be used & various other kernel fixes for the BSB.amd-bsb-dsc-fix.patch(source) - This corrects DSC timings to prevent sections with intricate geometry (fences, lettering) from causing visual artifacts that look like “rainbow static”.
- (Not recommended) For eye-tracking cameras:
- For the recommended workaround which doesn’t require a kernel patch, see #Bigscreen Beyond 2e Eyetracking.
0001-Change-device-uvc_version-check-on-dwMaxVideoFrameSi.patch- Works around a firmware bug in the Bigeye cameras
Thankfully, these distros have packages that are already mostly patched:
💡 TipIf you have the ability to use Arch Linux’s AUR, you can install
linux-bsb, which includes all the necessary patches for any BSB device. See the linux-bsb section on the hardware page for instructions and other details.
💡 TipThe CachyOS kernel currently includes:
bigscreen-beyond-kernel.patchamd-bsb-dsc-fix.patch- a slimmer version of
nvidia-bsb-dsc-fix.patch(only on 7.2-rc3 and above, and not in dkms yet)Which means CachyOS comes pre-patched for both GPU vendors.
It doesn’t include the eye-tracking cameras patch. We recommend the firmware flash method anyway.
Collect your patch file(s) and follow the general guide to kernel patching at the bottom of the hardware page.
Bigscreen Beyond Utility#
You can get the “Bigscreen Beyond Utility” app from Steam working via Proton by following these instructions:
- Use a Proton version ≥10 that has access to
PROTON_ENABLE_HIDRAWenvironment variable; Proton Experimental (on Steam) works well. - Set the Bigscreen Beyond Utility’s launch arguments to:
PROTON_ENABLE_HIDRAW=0x35BD/0x0101,0x35BD/0x4004,0x35BD/0x1001,0x35BD/0x0202,0x35BD/0x0282 %command% - Install the udev rules from the section below.
ℹ️ NoteThe ‘Invalid SteamVR folder - Some settings are unavailable!’ message can be ignored. Settings that are not available through the utility are:
- Changing the refresh rate, which can be changed by using Monado.
- Eye-tracking firmware updates, (see below for info on getting eye-tracking working). However, HMD firmware updates do work.
- Changing the IPD, possible to do elsewhere.
Flashing firmware updates#
ℹ️ NoteEyetracking firmware updates currently works on Windows only.
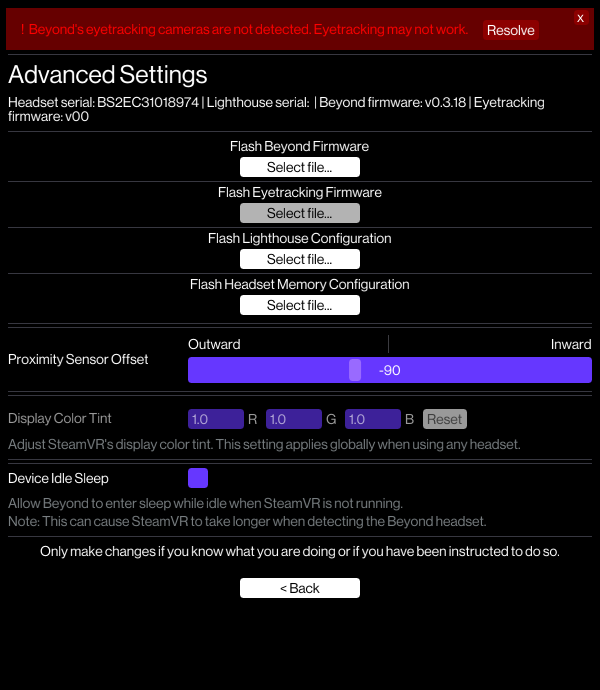
To flash a firmware or device configuration file, click on the “Utility version” number at the bottom of the window to reveal advanced settings:

Then select the appropriate flash button to select the firmware or configuration file.
Refresh Rate Mode Swapping#
The Bigscreen Beyond does not support switching modes in the “Bigscreen Beyond Utility” in Linux. Also, in the headset’s default 90 Hz mode, it does not expose other display modes to Monado through Vulkan.
This means that, unfortunately, you will need to use the Bigscreen Beyond Utility in Windows to change the headset to 75 Hz mode before you can use that mode or toggle between the two modes in Linux.
By default, the headset will start up in Monado in the mode you set it to in the utility in Windows, whether 75 Hz or 90 Hz. If you’d like to use one mode all the time, the easiest solution is to set the mode in Windows and leave it there.
Determining Current and Supported Display Modes#
Run this command:
STEAMVR_LH_ENABLE=true XRT_COMPOSITOR_LOG=debug XRT_COMPOSITOR_PRINT_MODES=true monado-service 2>&1 >/dev/null | grep -E '(choose_best_vk_mode_auto|get_primary_display_mode)'If you see output that includes this, your headset is configured to select modes in Linux:
DEBUG [choose_best_vk_mode_auto] Available Vk direct mode 0: 5088x2544@75.00
DEBUG [choose_best_vk_mode_auto] Available Vk direct mode 1: 3840x1920@90.00
Also, you will always see a line like this, indicating which mode was chosen and information about it:
DEBUG [get_primary_display_mode] found display mode 3840x1920@90.00Changing Modes#
If your supported display modes list both modes, you can set the environment variable XRT_COMPOSITOR_DESIRED_MODE to the index of the one you want use, either in Envision settings or in the environment before starting Monado.
For example, if mode 1 is 90 Hz based on the output from the supported modes command, XRT_COMPOSITOR_DESIRED_MODE=1 will cause Monado to select 90 Hz when starting up.
If your supported display modes doesn’t list both modes, unfortunately you will have to run the Bigscreen Beyond Utility in Windows and select the 75 Hz mode, then boot into Linux to be able to use other modes.
Adjusting Software IPD#
The Bigscreen Beyond Utility’s IPD adjustment does not work under wine/Proton.
If you have a windows installation, the easiest way to adjust the value is to boot into that & set it from the Utility.
If you use Monado, you can override the headset’s default IPD of 64mm by setting the environment variable LH_OVERRIDE_IPD_MM to some value (e.g. 64). This should be set such that the monado-service process can see it — if you use Envision, edit your profile and add it under Environment Variables.
Via lighthouse_console#
Very advanced users may use the lighthouse_console CLI program in
~/.local/share/Steam/steamapps/common/SteamVR/tools/lighthouse/bin/linux64/ to
directly update the headset config with their desired IPD. Exact instructions
are not included here on purpose.
Make sure to keep a local & offsite backup of your config before editing it if you try this.
🛑 CautionDo not attempt this unless you understand the process & risks, which may include sending your headset back to Bigscreen for repairs.
udev Rules#
In most use-cases, you will need udev rules for full functionality.
The following script will:
- Create a udev rules file, setting their GROUP fields to one your user is in so you have access to the devices
- Tell the udev daemon to apply the rules
Other notes about this script:
- This purposefully avoids using
TAG+="uaccess", since it is undocumented and unexpectedly picky about the exact number in the filename. It is easier to just pick a group. - On regular distros, run this script as your regular user, not root.
export udev_group=$(groups | tr ' ' '\n' | grep -E "$(whoami)"'|wheel|sudo|adm|admin|video|plugdev' | head -n 1)
bash -c 'sudo tee "/etc/udev/rules.d/99-bigscreen-beyond.rules" > /dev/null <<EOF
# Bigscreen Beyond
KERNEL=="hidraw*", SUBSYSTEM=="hidraw", ATTRS{idVendor}=="35bd", ATTRS{idProduct}=="0101", MODE="0660", GROUP="${udev_group}"
# Bigscreen Beyond Firmware Mode
KERNEL=="hidraw*", SUBSYSTEM=="hidraw", ATTRS{idVendor}=="35bd", ATTRS{idProduct}=="4004", MODE="0660", GROUP="${udev_group}"
# Bigscreen Beyond Error Mode
KERNEL=="hidraw*", SUBSYSTEM=="hidraw", ATTRS{idVendor}=="35bd", ATTRS{idProduct}=="1001", MODE="0660", GROUP="${udev_group}"

# Bigscreen Bigeye
KERNEL=="hidraw*", SUBSYSTEM=="hidraw", ATTRS{idVendor}=="35bd", ATTRS{idProduct}=="0202", MODE="0660", GROUP="${udev_group}"
# Bigscreen Bigeye DFU Mode
KERNEL=="hidraw*", SUBSYSTEM=="hidraw", ATTRS{idVendor}=="35bd", ATTRS{idProduct}=="0282", MODE="0660", GROUP="${udev_group}"
EOF'

sudo udevadm control --reload && sudo udevadm trigger
If your headset is already plugged in, disconnect & reconnect it to force the rules to fire.
On NixOS, use the following option, where you replace the PLACEHOLDER with the first group your user has from this list (You can list your groups with the groups command in the terminal): wheel, sudo, adm, admin, video, plugdev
services.udev.extraRules = let
  group = "PLACEHOLDER";
in ''
  # Bigscreen Beyond
  KERNEL=="hidraw*", SUBSYSTEM=="hidraw", ATTRS{idVendor}=="35bd", ATTRS{idProduct}=="0101", MODE="0660", GROUP="${group}"
  # Bigscreen Beyond Firmware Mode
  KERNEL=="hidraw*", SUBSYSTEM=="hidraw", ATTRS{idVendor}=="35bd", ATTRS{idProduct}=="4004", MODE="0660", GROUP="${group}"
  # Bigscreen Beyond Error Mode
  KERNEL=="hidraw*", SUBSYSTEM=="hidraw", ATTRS{idVendor}=="35bd", ATTRS{idProduct}=="1001", MODE="0660", GROUP="${group}"

  # Bigscreen Bigeye
  KERNEL=="hidraw*", SUBSYSTEM=="hidraw", ATTRS{idVendor}=="35bd", ATTRS{idProduct}=="0202", MODE="0660", GROUP="${group}"
  # Bigscreen Bigeye DFU Mode
  KERNEL=="hidraw*", SUBSYSTEM=="hidraw", ATTRS{idVendor}=="35bd", ATTRS{idProduct}=="0282", MODE="0660", GROUP="${group}"
'';
For some even more special use cases (such as using with libsurvive), you may need a more permissive udev rule. If you do, use the following udev rule. You will also need to be part of the wheel group.
KERNEL=="hidraw*", SUBSYSTEM=="hidraw", ATTRS{idVendor}=="35bd", MODE="0660", GROUP="wheel"
SUBSYSTEM=="usb", ATTRS{idVendor}=="35bd", MODE="0660", GROUP="wheel"
Bigscreen Beyond 2e Eyetracking#
As of firmware v54, the Bigscreen Bigeye cameras on the BSB2e do not load properly on Linux, because its firmware is not fully UVC 1.1 compliant.
While an official firmware update is in the works, the Bigscreen team have provided a custom firmware version which fixes this quirk, and allows the cameras to work out of the box on Linux:
To flash this firmware, you will need to use the Bigscreen Beyond Utility on Windows, as it currently does not support flashing firmware under Linux. Once this firmware is flashed, the eyetracking firmware version will differ and you should be able to view the cameras in any webcam viewer, including Baballonia.
For details on setting up eye tracking, please see the Baballonia Eye/Face Tracking guide.
The full stack can be pictured as such:
graph TB
   E[Bigscreen Beyond 2e]-->F
   F[Bigscreen Bigeye]-->B
   E-->M[Monado]
   M-->X[xrizer]
   X-->D
   B[Baballonia.Desktop] --> C[VRCFT.Avalonia] --> D[VRChat/etc.]
   subgraph Linux Native
   B
   C
   E
   F
   M
   X
   end
   subgraph Proton/Wine
   D
   end
Baballonia.Desktop can be given the Bigscreen Bigeye (videoN) endpoints for each camera if you’re using the bsb2e_linux fork. You’ll need to adjust cropping and brightness for the cameras as necessary, but it should allow you to easily select the whole left/right areas automatically for the Bigeye in particular.
Legacy Baballonia fork#
If you did not install the fixed firmware above, you can use the bsb2e_linux fork of Baballonia. However, it has not been maintained and will likely not behave well with recent versions of VRCFT and its Babble module. Symptoms may include no “out”/“outgoing” messages in VRCFT.
See its readme README. It uses libuvc to get around the firmware issues we have with the Bigeye cameras.
NixOS has not yet packaged Baballonia, but you can still run it with nix run 'git+https://github.com/leon-costa/Baballonia?submodules=1#default'.